Tuesday, August 09, 2005

Report from Rendezvous

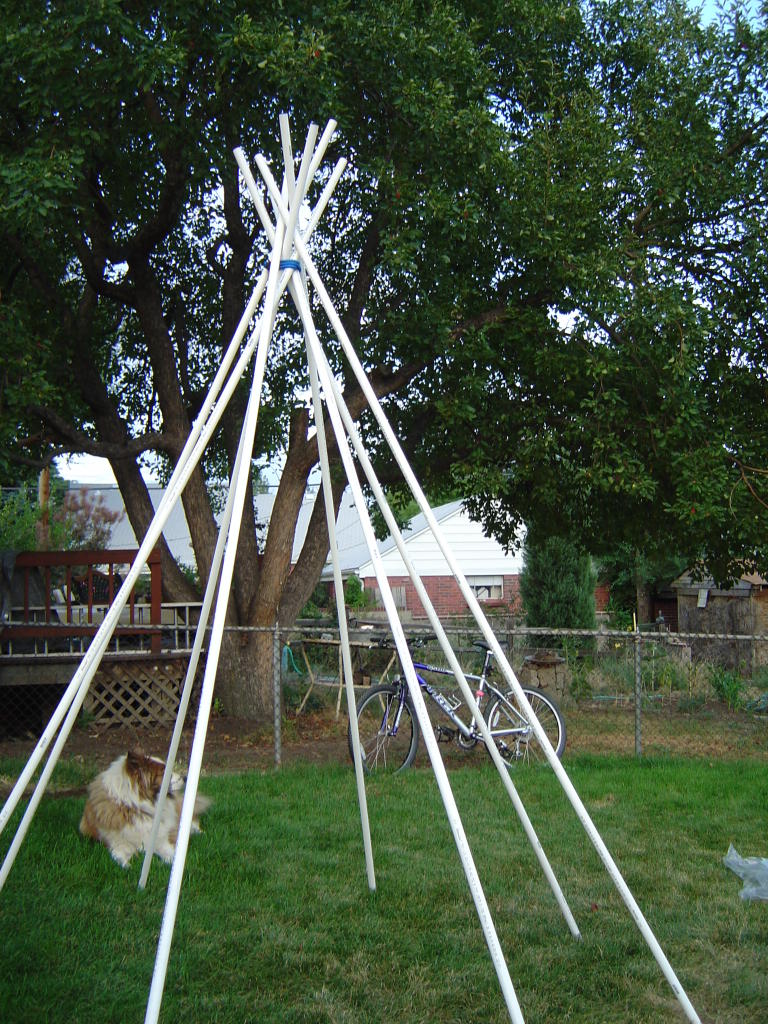
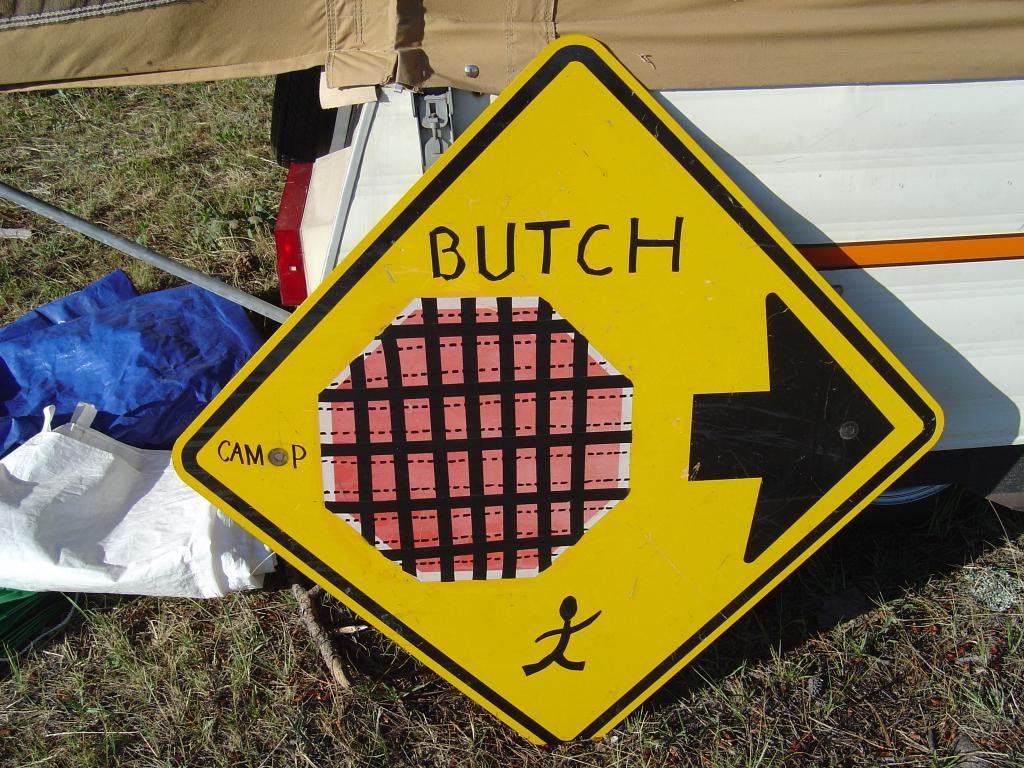
So the goal of the tipi was to have a visible sign of "Camp Butchland", our entry in the "Butchest Campsite" contest at Rendezvous. The motivating vision was to have a Boy scout-like encampment.

Here's our sign, made from a discarded roadsign picked up at a recycling center (Thanks Alex!) and decorated in electrical tape and black marker (Thanks Trish!)


We're not sure who we lost out to as we missed the camp awards part of Saturday's presentation, but we're pretty sure we didn't win. We were up against some stiff competition. At the very least, we need a catchier name to compete with "Beaver Creek" and "Bush Gardens".

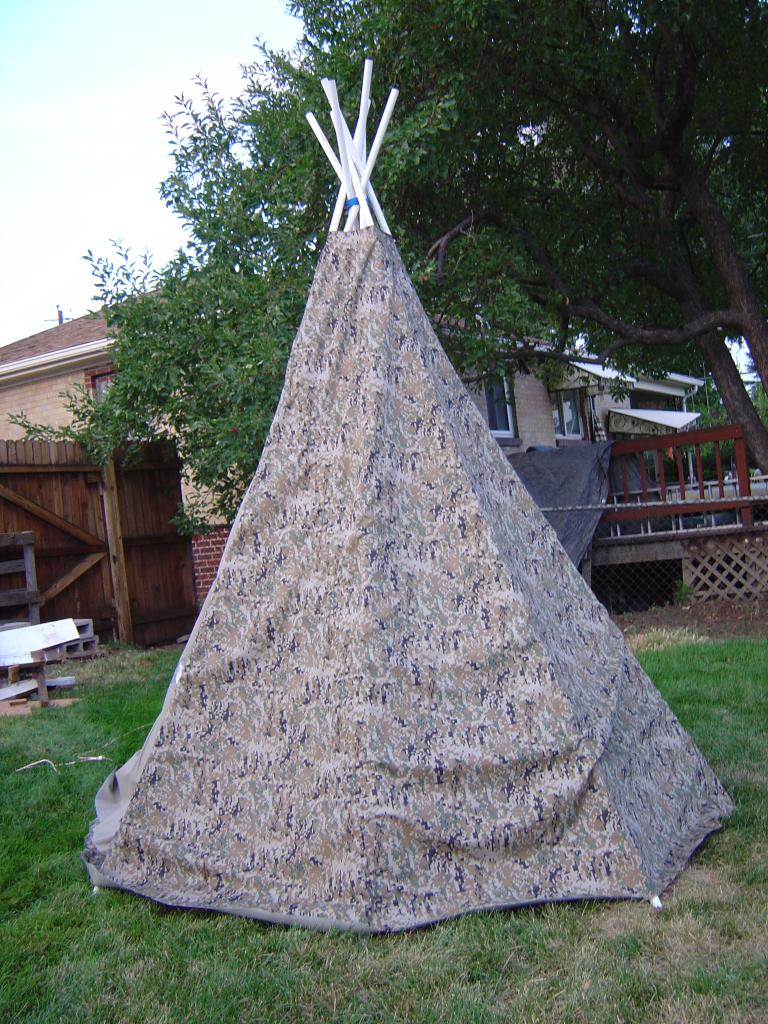
Here's the tipi staked out at our campsite in Wyoming. The wind had an interesting effect on the tent... it moved the poles in. This photo was taken nearly 20 hours since I'd put it up, and the cover went from being taut to being this slack.


I elected to not sleep in the tipi, mostly because I was worried about bugs. So I did a test and left the door open on my dome tent to see what the bug and critter level was like. The result: not too bad. Of course, that's following the principle that food should be kept away from the sleeping area. We stored dry food in my car trunk and all other food in coolers in the kitchen area. While I spotted a few ground squirrels, we didn't have any in camp.

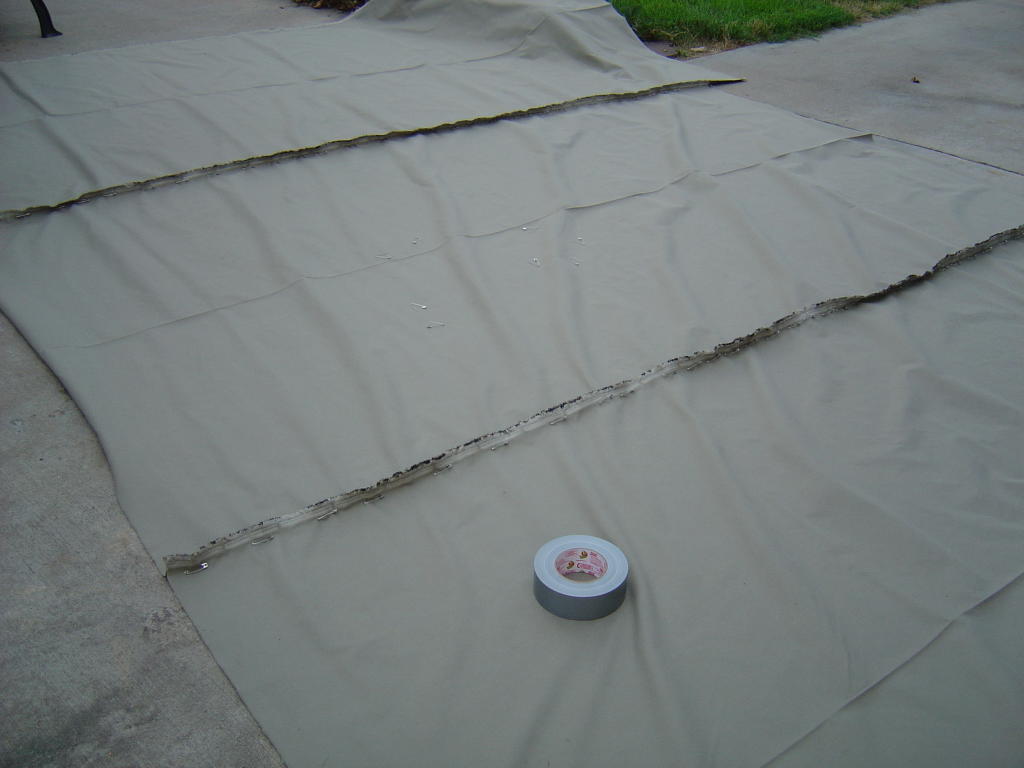
My parents had a set of tarp connectors in the early 70's that were made of a ball and a keyhole-shaped loop of wire. The tarp went over the ball, the tarp and the ball went through the round part of the loop, then the tarp and the ball were pulled into the smaller end. A guy rope was then tied to the round part and the other end of that staked out. Apparently, the traditional way to stake out a tipi was to use the same kind of setup around the cover. The cover then provides the opposition that keeps the tipi poles from collapsing.

I did something similar. This uses a practice golf ball (looks like a wiffle ball). The hank of rope has a slipknot around the ball and fabric and a non-slip knot in the other end. The other end is around the stakes. The sites I'm using as references call this a "pebble tie" and I'm going to go with that until I find or remember the other name.


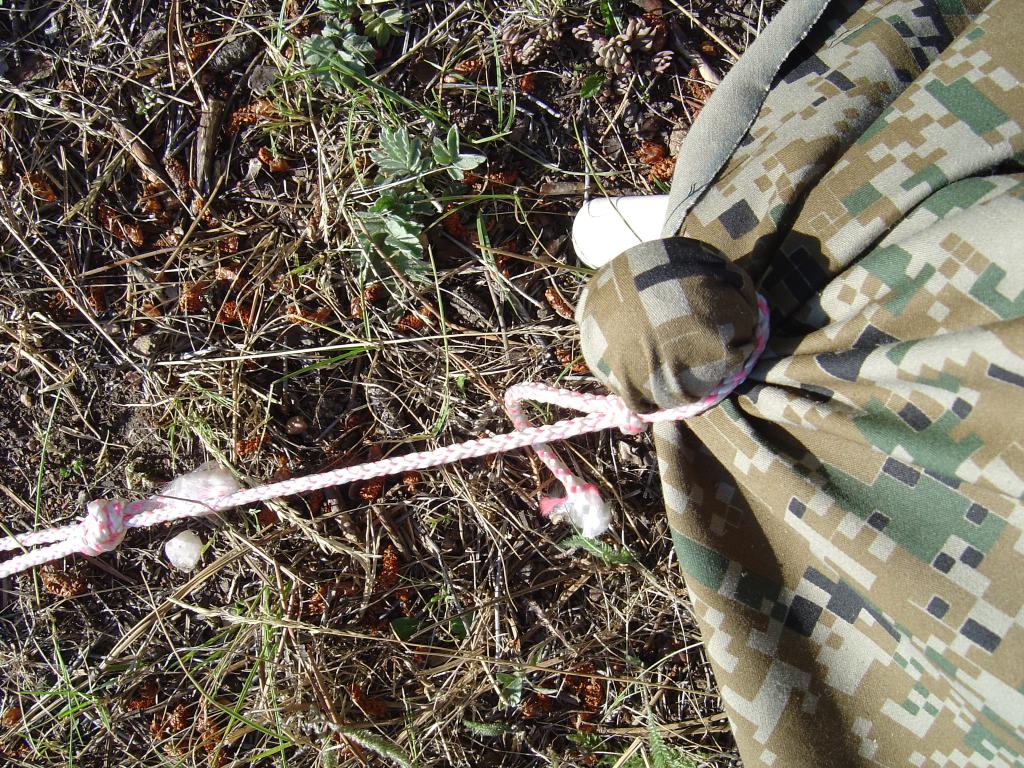
My tipi blew over within 30 minutes of being put up without the pebble ties, but stood for over 24 hours in blustery Wyoming wind with them.

I also used the pebble ties to stake out the trailing ends of our shade canopy. Since these are two unused sides of an easy-up tent, the leading edge is the velcro ties of the tarp connected to a cable strung between the trees.

Tuesday, August 02, 2005

Tipi

The goal is to make a tipi for our campsite at Rendezvous. The UGLW folks hold a variety of competitions every year, and Kathi has decided that this is the year to go for "butchest camp."

The original idea was to make a tipi out of flannel, but when I confessed my lifelong dream of building and sleeping in a tipi, construction got a bit more serious. My grandfather's copy of "Woodcraft" by Earnest Thompson Seton came off the shelf and I got to work.


The poles of the tipi are 3/4" PVC tubing. Instead of doing a tripod, I'm doing a "quadpod"... bungee-ing four poles together. The bungee cord is looped around three times and tied, not hooked. These four poles are then spread out and four additional poles are nested into the structure at the top. This provides 8 poles.


These are 10 foot poles, the length right off the shelves. There is a slight bow in the poles at this height. The poles meet at about 8.5 ft. This results in the tipi being about 6 ft tall... I can stand up in it and reach the knot.

Originally, we were going to try to make the tipi 15 feet tall, hoping that by jointing the PVC in 5 ft intervals, the poles would be rigid enough. They weren't. It was like standing partially-cooked spaghetti on end. ;-)


Changing the design for the smaller poles created a tipi that was uncomfortably claustrophobic when we covered it with the coated tarp we'd bought. So I went back to my original canvas plan.


This is 9 yards of 62" wide canvas printed with a pixelated camoflauge design. It also has a nice clean khaki on the back (no bleed through from the design), so the cover will be reversable.


I cut the fabric into 3 yard sections and re-assembled them to get a final piece that is 9 ft tall and 180" wide. This is a quick fix (and we don't have a sewing machine right now) so the seams are done first with quilting safety pins and then taped over with Duck "200mph" duct tape.

After that, I used a 20 lb dumbbell, a hank of clothes line, and a piece of chalk to make a compass that would measure a 9 ft radius semi-circle. I traced the semi-circle on the cloth and cut it out. I used some of the scrap from the corners to finish out the front corners.

Here's the finished product!


The floor space is about the same as a two-man dome tent. The cost is about the same as a high-end two-man dome tent, and it lacks a lot of those features. I will be using a tarp for the ground cover and dealing with bugs all weekend as there no netting in sight. I will probably also rig another tarp as a rain fly. I'm imagining that going over the top of the poles and being staked out to provide an entry area over the door.

I'll take photos over the weekend and report back.